From a floor plan to a live 3D map with turn-by-turn directions — step by step, with a short video for every step. Follow along with the practice plan, or with your own.
1
Before you start
2 min
You can build a complete map yourself in the Venue Studio — no coding, nothing to install. Plan on 30–60 minutes per floor the first time.
A floor plan for each level: a CAD file (DXF), an SVG, GeoJSON, an Apple IMDF zip, or simply a PNG/JPG of the plan.
Your store or department list (optional) — a spreadsheet with names, categories and opening hours.
A desktop browser (Chrome, Edge, Safari or Firefox). Your work is saved in that browser as you go.
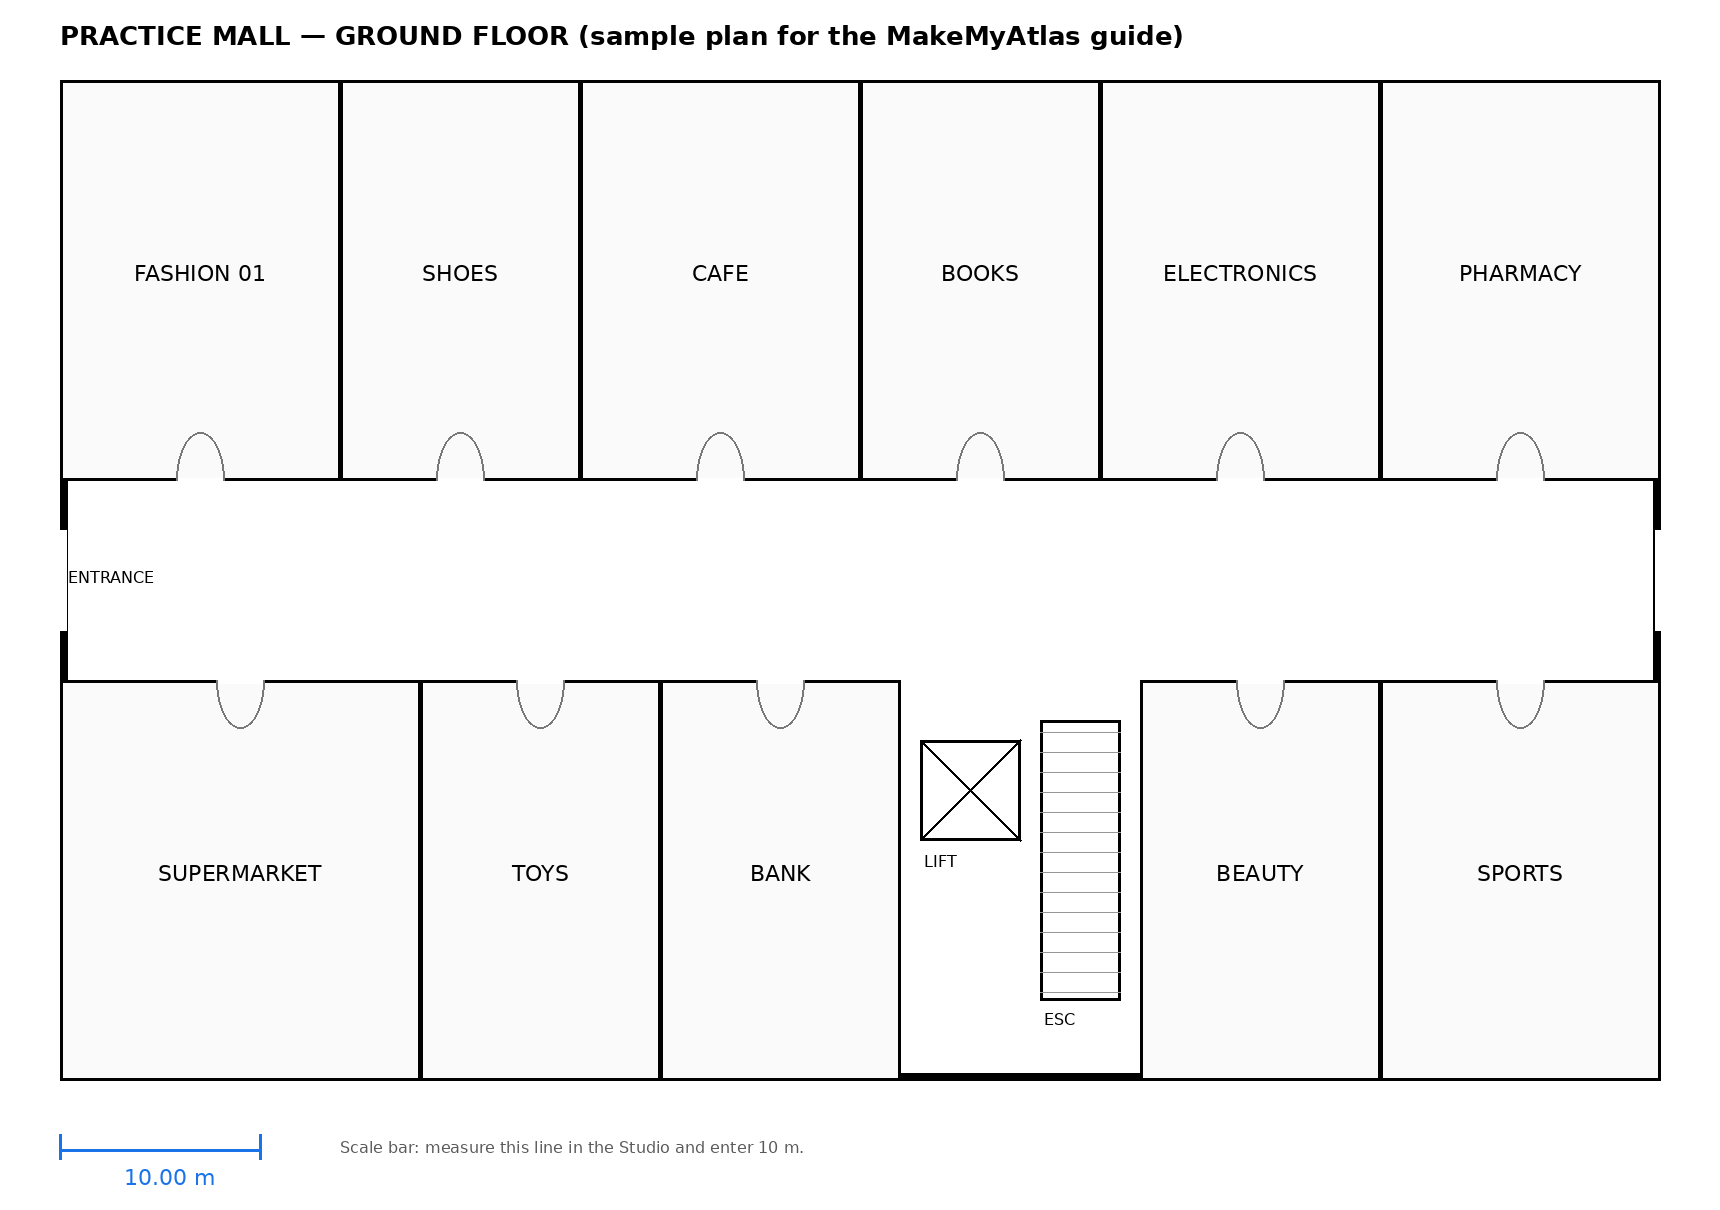
Want to practise first? Download the practice plan and follow every step of this guide with it — it is exactly what the videos below use.
Open makemyatlas.com/studio. A new, empty venue appears. Choose Import files to start from your plan — or Open the sample mall to look around a finished venue first.
The Venue Studio: tools on the left, the plan in the middle, settings on the right.
Every change is saved automatically in this browser. Use the same computer and browser to continue later, and export your work regularly (step 12).
3
Import your floor plan
3 min
Click Import, then Choose files (or drop files on the window). The Studio recognises the file type and asks only what it needs:
Pick the floor (or + New floor…), leave the approximate width as it is and press Add image. The plan is placed under the editor so you can trace over it. You set the exact scale in the next step.
Importing a floor-plan image onto a new “Ground Floor”.
Tell the Studio what each CAD layer contains — shops, walls, the outline, cores, text labels. Text inside a closed shape becomes the shop’s name. Check Metres per drawing unit (0.001 if the drawing is in millimetres).
Mapping DXF layers to shops, walls and the outline.
Have a DWG? In AutoCAD use Save As → DXF. Have a PDF? Export the page as PNG and import the image.
A spreadsheet can add a whole store directory at once. Rows whose name matches a shop you drew update its category, hours, phone and website. Rows with x, y become points; rows with width/depth become shop areas.
Merging a store list into the map.
GeoJSON (with level, kind and name properties) and Apple IMDF archives come in fully drawn: levels, units, openings and amenities. Review names and categories afterwards.
A two-floor GeoJSON ready to import.
All supported inputs. Whatever goes in, the same map comes out.
4
Set the scale
1 min
Routes, walking times and shop sizes are only right if the plan has the right scale. After an image import the Measure tool (M) is already selected:
Click both ends of something whose real length you know — a scale bar, a door (≈ 0.9 m), a shop front, a column grid.
Type the real length in metres.
Choose Scale everything on this floor and press Apply scale.
Measuring the 10 m scale bar and applying the scale.
Not sure? Measure a second, longer distance afterwards — the Measure tool shows its length, and it should match.
5
Draw the floor outline
1 min
Choose Floor outline (O) and click the corners of the building’s outer wall, then press Enter. Everything inside the outline that isn’t a shop, wall or obstacle is treated as walkable — you never draw corridors or a path network.
Tracing the outer wall; Enter closes the outline.
6
Trace and name the shops
10–30 min
Choose Rectangle (R) for box-shaped units or Polygon (P) for any shape. Set the Area type and Category in the bar above the plan, drag over a unit, then type its name in the Inspector on the right.
Loading the standard categories, then drawing and naming three units.
V select & move · drag a corner to reshape · double-click an edge to add a corner · Del removes
Hold Space and drag to pan · scroll to zoom · Ctrl+Z undo
Categories colour the map and power the category grid visitors browse. Load the standard set in Categories → Add defaults, then rename or add your own.
7
Mark the entrances (optional)
2 min
Routes end at a shop’s door. If you skip this, the router uses the middle of the shop front facing the widest corridor — usually right. For shops with a side or corner door, choose Shop entrance (E) and click the shop’s edge where the door is.
Clicking on the shop front adds an entrance (small orange dot).
8
Add floors, lifts, escalators and stairs
5 min
Add a level with + Floor above the plan (the outline is copied). Then choose Connector (C), pick elevator, escalator, stairs or ramp, and:
click where it is on this floor,
switch floor with the tabs above the plan and click where it arrives,
repeat for every floor it serves, then press Finish connector.
Adding Floor 1 and a lift that serves both floors.
Lifts are marked wheelchair-accessible automatically; stairs and escalators are skipped when a visitor turns on step-free routing. Escalators can be one-way (up or down) in the Inspector.
9
Place “You are here” QR signs
5 min
Visitors find their position by scanning a printed QR sign — no beacons needed. Choose QR anchor (Q) and click where each sign will hang: entrances, lift lobbies, car-park exits, key junctions. Give each a label.
Placing a QR anchor at the main entrance and labelling it.
When you are done, QR sheet (top bar) opens a print-ready page with one code per anchor. Print, laminate, and mount each sign at its marked spot.
The printable QR sheet.
Set Venue → Public viewer URL to your final map address (for example makemyatlas.com/map/your-venue) before printing — the codes point there.
10
Make it look like your building (optional)
3 min
Open the Look tab and drop in a few photos of your interior — corridors, shopfronts, the atrium. The Studio matches the floor finish and colour, walls, metal frames, glass tint and lighting. You can also fine-tune every material by hand, and add a photo to each shop so visitors see it on the place card.
The Look tab: photos in, materials out.
11
Check every route
1 min
Open Check and press Test all routes. The Studio walks from your first QR anchor to every single place, like a visitor would, and lists anything it cannot reach — usually a missing connector, a shop with no gap to the corridor, or a wall drawn across a corridor. Click a problem to jump to it.
Every place reachable.
12
Preview in 3D
2 min
Press Preview 3D. Your map opens in a new tab exactly as visitors will see it: search a place, tap Get Directions, and press Simulate to walk the route turn by turn.
The practice mall from this guide, routed from the entrance to the Pharmacy.
13
Name your venue and export
1 min
In Venue, set the name, a short venue id (it becomes the web address, e.g. practice-mall), the languages and the public viewer URL. Then press Export venue.json — one file that contains your whole map.
Venue settings.Export venue.json is in the top bar.The file is downloaded and the Studio tells you where it goes.
Keep this file safe — it is your map. To change anything later, import it back into the Studio, edit, and export again.
14
Publish and share
5 min
Send us your venue.json at [email protected] (or ask us to build the map for you). We publish it at:
https://makemyatlas.com/map/your-venue-id
From there you can share it however suits your visitors:
A link — on your website, in booking confirmations, appointment letters and emails.
Printed QR signs — from step 9, at entrances and lift lobbies.
An embed — the map inside your own website (copy the snippet below, or see the developer track).
Visitors open the link or scan a sign — no app. They search, get short step-by-step directions (“Slight left at Swarovski”, “Take the lift to Level 2”), and can follow the route in street view or on the map, with real lifts and escalators between floors.
Street-level turn-by-turn navigation in the demo mall.
Try it yourself: open the live demos — or scan a demo’s QR code with your phone.
1
How it fits together
2 min
MakeMyAtlas is a static web app. One JSON file describes a venue; the viewer renders it in 3D and does all routing in the browser — there is no backend and no per-visitor server call.
Routing: each floor is rasterised at 0.5 m; A* runs across floors with connector costs; paths keep clear of walls and are straightened. Instructions are generated for every bend ≥ 10° and every ~15 m on long straights.
Positioning: QR anchors (?at=), tap-to-place, and “Walk with me” pedestrian dead-reckoning (accelerometer + compass) snapped to the route. Sensors and the camera need HTTPS.
2
The venue.json format
5 min
Coordinates are metres on a flat plan (x right, y down). Everything the map needs is here; the full reference is in VENUE-FORMAT.md.
The blue dot starts at the sign, facing heading (degrees clockwise from plan-up). “Walk with me” then follows the visitor with step detection and the compass, snaps to the route, re-routes after wrong turns and asks the visitor to confirm floor changes at lifts. Set venue.northOffset so the compass matches the plan.
Print a QR sheet from the Studio after setting Public viewer URL; anchors you add later need new codes.
6
Loading your own file and self-hosting
3 min
Quick test without publishing: host your venue.json anywhere that sends CORS headers and pass it with src:
Self-hosting: the whole viewer is static files. Put your file at venues/<venue id>/venue.json next to index.html and open index.html?venue=<venue id> — on any static host (Cloudflare Pages, Netlify, S3, nginx). Use HTTPS for the camera and motion sensors.